Comments
With Comments, you can easily collect feedback on your designs from stakeholders, customers, or teammates, even if they don’t have a UXPin account.
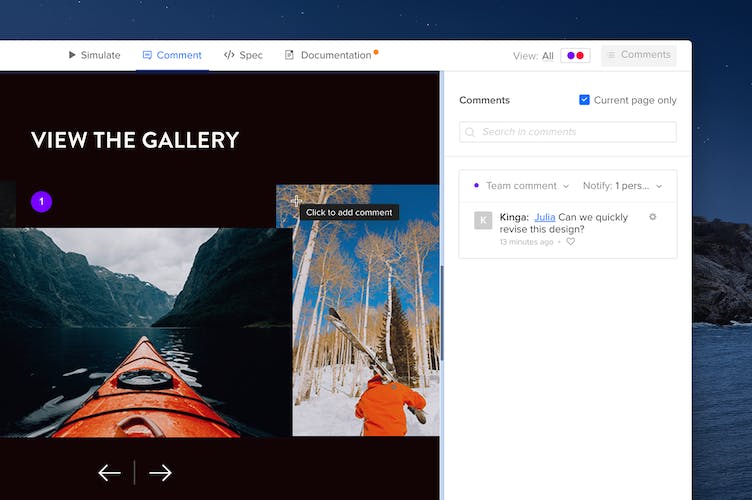
You can add comments in the Editor and on Preview.
Adding Comments
To add a comment in the Editor:
- Click on the Comment icon in the left Toolbar, or use the keyboard shortcut
"C"
. - You can click anywhere on the Canvas to add a Comment.
- Type your comment in the comment field and click Post or hit
"Enter"
.
Note
You can’t edit elements on the canvas while in the Comment mode.
Comments on Preview
To add a Comment on Preview:
- Click Comment in the Top bar.
- Click anywhere on the Canvas to add a Comment.
- Type your comment in the comment field and click Add comment to post it, or hit
"Enter"
.
To view all your comments on Preview, click on Comments in the top right corner.
To edit a comment on Preview:
- Select a comment on the design or in the Comments Panel.
- Click on the cog icon above the comment field.
- Choose Edit.

Replying to Comments
To reply to a comment, select a Comment on the canvas or in the Comments Panel to open it. Then, leave your reply below. All the replies will be visible on the canvas and in the Comments Panel, both in the Editor and on Preview.
Mentions
You can mention teammates in your Comments with an
"@"
to keep them informed.
Team and Public Comments
There are two types of Comments in UXPin, Team and Public.
- Team Comments – comments that are only visible to your Team. Your Team are all the users that you have added as Team members in the Team Management.
- Public Comments – comments that are visible to anyone, even if they don’t have a UXPin account.
You can change the type of comment. To do that, click on the comment type next to the red (or blue) dot in the upper left corner of the comment modal and choose Make Public or Make Team Only, depending on the current type of your Comment.
When you share a design with someone who doesn’t have a UXPin account, they can still comment on your design. If you want to disable comments on your prototype, uncheck the Show Comments option on the Share modal.
Viewing Comments
To view the Comments on a Prototype inside the Editor, click the Comment icon in the left Toolbar or press
"C"
.
From now on, Comments will be visible on the canvas exactly where they were placed as well as in the Comments Panel to the right. Click on a comment in the Comments Panel to open it on the Canvas.
Filtering Comments
All Comments from a Prototype are listed in the Comments panel to the right. That’s where you can filter Comments to view:
- Comments assigned to you
- Unassigned comments
- Comments from all pages
- Unresolved comments
Assigning Comments
To assign a Comment to a teammate, click the avatar in the comment field on the canvas or in the Comments Panel. Then, choose a teammate.
Resolving Comments
As soon as you collect your feedback, you can mark a Comment as Resolved. In the Editor:
- Select a Comment on the Canvas or in Comments Panel to open it.
- Click the checkbox in the top-right corner to mark it as Resolved.
- This will turn the comment green in the Comments Panel and on the Canvas.\
On Preview:
- Select a Comment on the design or in the Comments Panel.
- Check the Resolve checkbox in the bottom-right corner of the comment field.
- The Comment will be marked as Solved.
Email Notifications
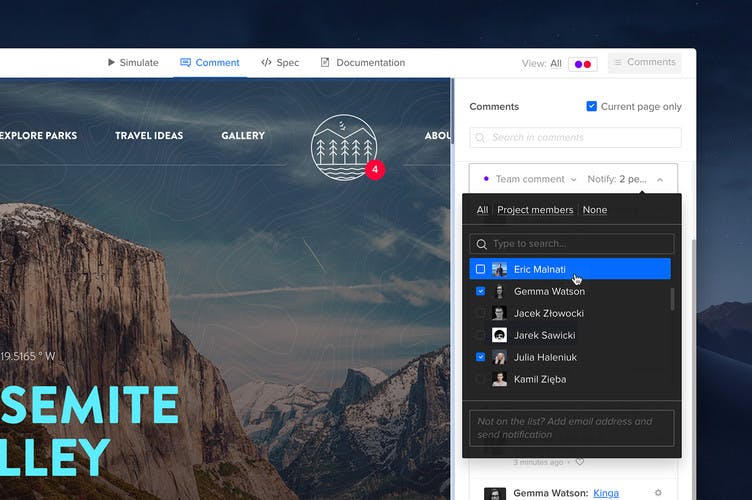
By default, all members added to the project you’re working on are automatically notified when a new comment is added, but you can choose who gets the email and who doesn't.
When adding a comment, you will see a Notify section in the top right corner of the pop up. You can choose to notify Project members (default), All, or None.
