Useful Tips for Great App Icon Design
Icon design plays a crucial role in helping users navigate interfaces. Icons replace words so that UX designers can create a clean, easy-to-navigate user experience.
Designing an icon set provides users with a unique, on-brand experience while providing helpful directions and instructions.
Icon design has many challenges as designers must find the perfect balance between form and function for these communicative symbols. Icons need to look beautiful while conveying an important message to the user.
UXPin makes icon design effortless, especially if you are working with a team. You can get started with a 14-day free trial and start creating beautiful icons for your next project.
What is Icon Design
Humans have used symbols throughout our existence. These small but highly technical illustrations provide a universal language for service, directions, features, warnings, design, marketing, and much more.

Icon design creates a visual representation of a program, entity, data, interactions, or actions in software, websites, and applications. These universally recognizable icons enable users from around the world to navigate quickly through a website or application.
A Brief History of Icon Design
Graphic designer Susan Kare is widely recognized as the pioneer of pixel art and modern icon design. Her work dates back to the early 1980s at Apple, where she designed interface elements and contributed to Apple’s typefaces.
Susan designed all of Apple’s icons and typefaces on graph paper before drawing everything out pixel-by-pixel on a Mac, nothing like the sophisticated UX design tools we have today! By 1984, Susan had switched to the first release of MacPaint, which made icon design much easier.
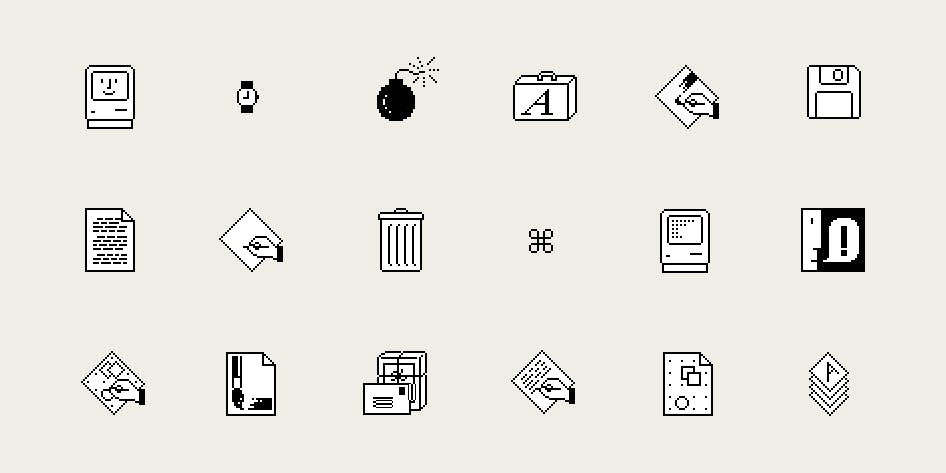
Some of Susan Kare’s early icons include scissors (‘cut’), a finger (‘paste’), a paintbrush, and a pencil.
Icon Design Process
Icon design starts with identifying which icons your project will need. It’s a good practice to list all of your design’s pages, actions, navigation, and interactions, so you can identify where you might need icons.
Some considerations for icon design:
- Try to keep your icons as simple as possible with minimal detail. Many icons live in a 24×24 pixel world. So, if you have too much detail, your icons will appear as incoherent blobs.
- Don’t try to reinvent the wheel for universally recognizable icons like the cog for settings or heart for like. It’s important to exercise creativity when designing an icon set, but don’t forget to maintain a user-centered approach. In UXPin you can freely use ready Material Design icons that are waiting for you in ready libraries.
- Uniformity is what separates an average icon set from a great one. If you are working in a team, you must develop a guideline for everyone to follow. For example, maintaining a 5px corner radius for every stroke.
- You also need to ensure your icons are on-brand while conforming to the project’s design system.
Due to their small size, icon design can appear deceptively simple. But, with all of the above to consider, things can get technical and require a lot of thought.
Consistency in Icon Design
Maintaining consistency is challenging when designing icons, especially when working in a team.
The first step is to decide on a grid. Always use a 1px grid, as this will give you the best visual reference for your canvas.
Next, you need to decide if you are designing in multiples of 8 or 10? Most icon sets follow multiples of 8 with sizes of 16, 24, 32, 40, 48, and so on.
To maintain consistency, decide which multiple will be your base size for designing all your icons. For example, if you’re designing at 512 pixels, make sure you design all your icons at 512 and then scale up or down.
Some designers prefer to start with the largest size they’ll need for the project and then scale it down as required. It’s often easier to remove strokes than it is to add them.
Stay On-Pixel
One trick to maintaining consistency is staying “on-pixel.” Like a child coloring in the lines, you want all of your icon’s strokes to remain inside the gridlines rather than straddle them. If you need to straddle a gridline, center your strokes to maintain an on-pixel aesthetic.

Staying on-pixel will help keep your icons clean and consistent as you scale up and down. It’s also an excellent way to maintain uniformity across your icon set.
To Fill or Not to Fill
Another consideration for clarity and consistency is whether your icons are stroke (sometimes referred to as line or outline), fill or an icon set with both variations. In most cases, branding will play a key role in whether your icons use a stroke or fill design.
Stroke icon design is fantastic for capturing detail, while filled icons are bolder, providing the user with more clarity.
Technical Rules
Your strokes, shapes, corners, curves, and angles should be mathematically precise to maintain consistency across your icon set. Even if you’re aiming for a hand-drawn aesthetic, sticking to numbers rather than freehanding your icons will help maintain uniformity.
For example, are your ends rounded or square? Are you using whole number increments or decimals? What are your portrait and landscape ratios? What are your angle increments?
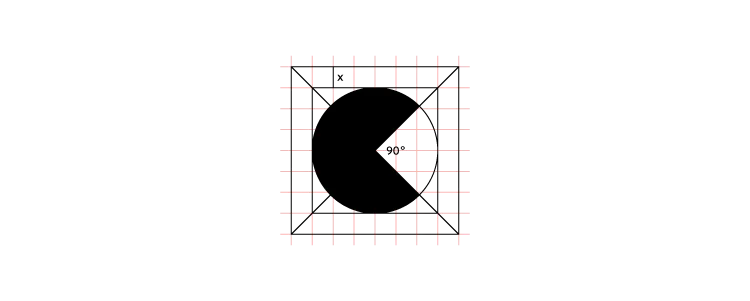
Like any design system, your technical rules will evolve as you grow your icon set. Even for a small icon set, keeping detailed documentation will allow you and your team to maintain consistency. These rules also streamline onboarding or handover.
Clarity in Icon Design
While it’s important to inject your brand’s creativity into your designs, your icons must make sense to the user. Think of icon design as a language rather than illustrations. What message do you want to send to the user?
For example, if you have a “view” action, an eye icon would make the most sense. You could also use a camera or a pair of binoculars (both used to “view” things), but the user might relate these symbols to capturing an image or sightseeing.
If you’re designing an icon for something new or unfamiliar to the user, do some research to figure out how to convey your message visually.
Follow the Rules of Icon Design
If you approach icon design as a universal language, you’ll recognize the importance of sticking to a set of rules and principles.
If you’re giving someone directions, you’re going to point where to go, not wave at them. The same is true for icon design. The house icon always means home icon, search is always a magnifying glass icon, and the bin icon always represents delete.
Google’s Material Icons feature a vast library of standardized symbols to reference if you are ever stuck. Redesigning versions of Material Icons will help keep your icon set universally recognizable.
Color in Icon Design
Incorporating color can help keep your icons on-brand or draw users’ attention to important actions or features. Color can also assist users with navigation by using a different colored icon for an active state.
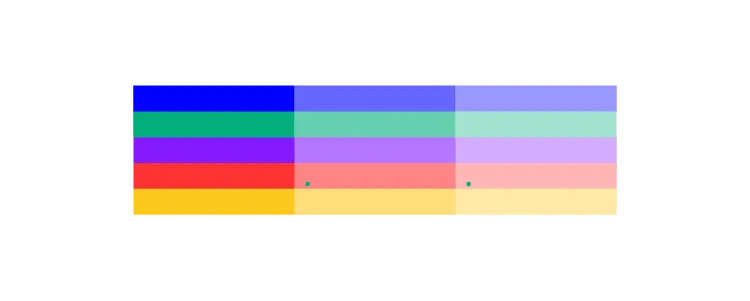
Designers must exercise caution when using more than one color as icons become challenging to read.
Generally, two colors for icon design work best with a different color for the background and symbol. As you scale icons beyond 64 pixels, it becomes a little easier to incorporate several colors and shading without losing any detail.
Accessibility
If you are using color, make sure you test your icon designs against your project’s backgrounds, as sometimes icons are difficult to see without the right contrast.

Considering accessibility is crucial when choosing colors because icons are small and can be challenging to see. Using our built-in contrast checker will ensure your icons stand out for users with visual impairments.
Cultural Meaning
Icon designers must also consider how different cultures will interpret colors, hand gestures, and symbols. If you are designing a product for a specific marketplace, some local language and culture research can prevent users from misinterpreting or misunderstanding an icon’s meaning.
White Space
White space is another factor designers need to consider to make icons legible and accessible. White space also adds balance resulting in a visually pleasing experience for users.
Because icons have to scale down (sometimes 20 times or more from the original size), white space plays a critical role in maintaining the design’s form.
Iconic…icons

The at (@) symbol is possibly one of the most used icons today. It’s found in email addresses and used to tag accounts on social media but has an ancient history. The @ dates back to the early 1,300s when it was used to capitalize the letter ‘A’ in Amen.
The peace sign is another universally recognizable icon, first used in 1958 for an anti-nuclear protest in England. Gerald Holtom designed the symbol using the N and D (representing Nuclear Disarmament) from the Semaphore alphabet.
The International Symbol of Access, often referred to as the wheelchair symbol, is used worldwide and online to represent accessibility features for people with disabilities. Danish design student Susanne Koefed designed the icon in 1968. The original design was headless; several years later, a circle was added to the top for the character’s head.
The power icon is a combination of the | and O found on analog power switches. With the advent of digital electronics, the power switch changed to a button, so designers combined the two symbols with the | nested inside a broken circle (representing the O).
Designing Icons with UXPin
UXPin is the perfect tool for icon design. You can invite your team to collaborate on your icon set, use the built-in icon library and share the project’s URL for clients to review and provide feedback.
UXPin also makes it super easy to set up a grid for your icon design. Here is an example to create 24-pixel icons in UXPin.
- Choose a canvas or create a custom one. We used a 340×720 canvas for this example.
- Set your COLUMN GRID to 10 x columns, 24px width, 10px gutter, 5px offset.
- Set your BASELINE GRID to auto columns, 24px height, 10px gutter, 0px margin.
Adjust your width and height to suit your icon design requirements. Try it for yourself! Start designing icons in UXPin today with a 14-day free trial.

